简介
OpenVPN 是一个功能齐全的 SSL VPN,它使用行业标准 SSL/TLS 协议实现 OSI 第 2 层或第 3 层安全网络扩展,支持基于证书、智能卡和/或用户名/密码凭据的灵活客户端身份验证方法,并允许用户或使用应用于 VPN 虚拟接口的防火墙规则的特定于组的访问控制策略。
应用场景
在家庭网络中有动态公网IP的前提下,当我们在外部,想要访问家庭内部网络。一般可以通过路由器端口映射的方式进行,通过动态公网IP和映射的指定端口,来访问家庭内部网络环境中的一些网络服务。在把家庭网络环境中的服务直接暴露在公网环境下,可能会对家庭内部网络造成安全隐患。
内部系统可能会存在一些漏洞未能及时修复,造成网络安全问题。这些漏洞为黑客们提供了各种机会,绝大多数非法入侵、木马、病毒都是通过漏洞来突破网络安全防线的。
因此我们在考虑网络安全因素下,家庭网络环境对外访问只通过 VPN 服务进行访问,对外暴露服务只暴露VPN服务即可。从而保证有效提高了我们家庭内部网络环境的安全性。
硬件环境
树莓派3B+
|
CPU主频 |
1.4 GHz |
|
核心数量 |
4 核 |
|
线程数量 |
4 线程 |
|
核心架构 |
BCM |
树莓派3B+所用的BCM2835是基于ARMv7 32位架构的4核心ARMv7 Processor rev 4(v7l)处理器
虽然树莓派3B+的硬件支持64位的系统,但是官方的系统还是32位的,主要应该是为了兼容之前的硬件
安装openvpn和easy-rsa
sudo apt-get install -y easy-rsa
sudo apt-get install -y openvpn
- easy-rsa包 提供证书生成脚本、模板配置文件等创建相关目录
- openvpn就是我们今天要安装的包了
升级easy-rsa为v3.0.8版本
树莓派中的easy-rsa源安装的版本为v2.x.x,要把版本升级到v3.0.8。由于树莓派系统是基于Debian创建“新的”分支系统,我们可以使用Debian系统版本中的deb安装包,来安装easy-rsa v3.0.8
使用https://pkgs.org下载deb安装包,树莓派是ARM架构
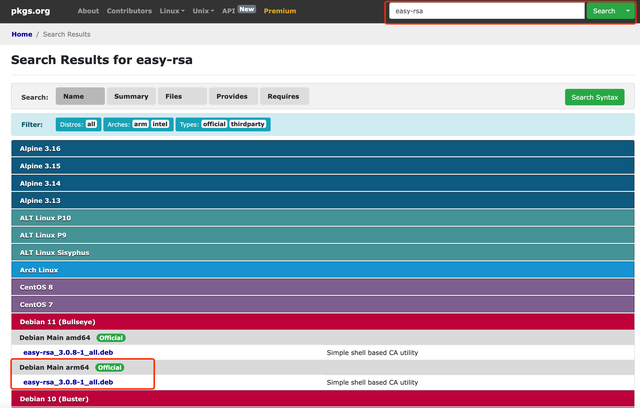
点击easy-rsa_3.0.8-1_all.deb打开下载页面
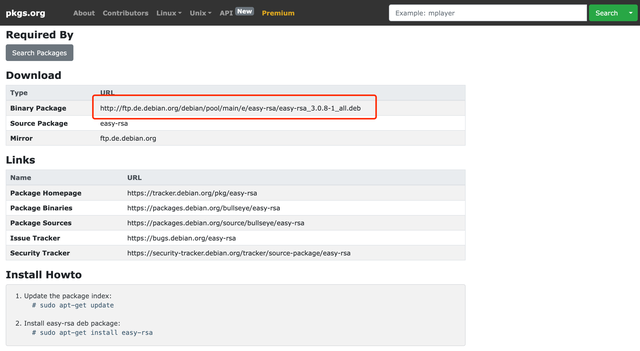
复制下载地址,使用wget下载文件
wget http://ftp.de.debian.org/debian/pool/main/e/easy-rsa/easy-rsa_3.0.8-1_all.deb
安装 easy-rsa_3.0.8-1_all.deb文件
dpkg -i easy-rsa_3.0.8-1_all.deb
配置证书密钥
复制easy-rsa配置信息
# sudo cp -rf /usr/share/easy-rsa/3.0.8 /etc/openvpn/server/easy-rsa
sudo cp -rf /usr/share/easy-rsa /etc/openvpn/server/easy-rsa
cd /etc/openvpn/server/easy-rsa
编辑vars文件
vim vars
# 国家
set_var EASYRSA_REQ_COUNTRY "CN"
# 地区
set_var EASYRSA_REQ_PROVINCE "Shandong"
# 城市
set_var EASYRSA_REQ_CITY "Jinan"
# 组织
set_var EASYRSA_REQ_ORG "Nilorg CA"
# 邮箱
set_var EASYRSA_REQ_EMAIL "xudeyi1998@.qq.com"
# 拥有者
set_var EASYRSA_REQ_OU  "Home"
使变量生效
source ./vars
生成 CA 根证书
cd /etc/openvpn/server/easy-rsa
sudo ./easyrsa init-pki
sudo ./easyrsa build-ca nopass
init-pki:初始化,创建pki文件夹,用来存放即将生成的证书
生成 OpenVPN 服务器/客户端证书和密钥
# 生成服务端证书, nopass 参数设定证书无密码
sudo ./easyrsa build-server-full server nopass
# 生成客户端证书, nopass 参数设定证书无密码
sudo ./easyrsa build-client-full client1 nopass
# 创建Diffie-Hellman
sudo ./easyrsa gen-dh
# 生成ta.key
openvpn --genkey --secret ta.key
- build-server-full : 生成服务端/客户端证书
- Diffie-Hellman,迪菲·赫尔曼密钥交换 是一种安全协议。它可以让双方在完全没有对方任何预先信息的条件下通过不安全信道创建起一个密钥。这个密钥可以在后续的通讯中作为对称密钥来加密通讯内容。
- ta.key用于防御DoS、UDP淹没等恶意攻击。
配置 OpenVPN 服务端
复制配置文件
# server.conf 如果server.conf不存在,需要对目录下的
cp /usr/share/doc/openvpn/examples/sample-config-files/server.conf /etc/openvpn/
复制证书及密钥文件
然后将CA的证书, VPN Server的证书和密钥, 以及Diffie-Hellman参数文件复制到 /etc/openvpn/server 目录下
cp /etc/openvpn/server/easy-rsa/pki/ca.crt /etc/openvpn/server
cp /etc/openvpn/server/easy-rsa/pki/issued/server.crt /etc/openvpn/server
cp /etc/openvpn/server/easy-rsa/pki/private/server.key /etc/openvpn/server
cp /etc/openvpn/server/easy-rsa/pki/dh.pem /etc/openvpn/server/
编辑配置文件
编辑server.conf配置,去除无用配置项
local 0.0.0.0
port 1194
proto tcp

# dev tap
dev tun

ca /etc/openvpn/server/easy-rsa/pki/ca.crt
cert /etc/openvpn/server/easy-rsa/pki/issued/server.crt
key /etc/openvpn/server/easy-rsa/pki/private/server.key
dh /etc/openvpn/server/easy-rsa/dh.pem

server 10.8.0.0 255.255.255.0

ifconfig-pool-persist /etc/openvpn/server/ipp.txt

push "route 192.168.0.0 255.255.255.0"

# If enabled, this directive will configure
# all clients to redirect their default
#.NETwork gateway through the VPN, causing
# all IP traffic such as web browsing and
# and DNS lookups to go through the VPN
# (The OpenVPN server machine may need to NAT
# or bridge the TUN/TAP interface to the internet
# in order for this to work properly).
# push "redirect-gateway def1 bypass-dhcp"

# push "dhcp-option DNS 208.67.222.222"
# push "dhcp-option DNS 208.67.220.220"

client-to-client

keepalive 10 120

# For extra security beyond that provided
# by SSL/TLS, create an "HMAC firewall"
# to help block DoS attacks and UDP port flooding.
#
# Generate with:
#   openvpn --genkey --secret ta.key
#
# The server and each client must have
# a copy of this key.
# The second parameter should be '0'
# on the server and '1' on the clients.
tls-auth /etc/openvpn/server/ta.key 0 # This file is secret

# Select a cryptographic cipher.
# This config item must be copied to
# the client config file as well.
# Note that 2.4 client/server will automatically
# negotiate AES-256-GCM in TLS mode.
# See also the ncp-cipher option in the manpage
cipher AES-256-CBC

comp-lzo

max-clients 100

persist-key
persist-tun

status /var/log/openvpn/status.log
log         /var/log/openvpn/openvpn.log
log-Append  /var/log/openvpn/openvpn.log

verb 3

mute 20
配置iptables
配置iptables设置nat规则和打开路由转发
iptables -t nat -A POSTROUTING -s 10.8.0.0/24 -j MASQUERADE
iptables -vnL -t nat
# 打开路由转发
vim /etc/sysctl.conf
# 修改net.ipv4.ip_forward
net.ipv4.ip_forward = 1

sysctl -p
验证服务
systemctl status openvpn@server.service
systemctl restart openvpn@server.service
配置OpenVPN客户端
复制配置文件
# 创建客户端配置文件
mkdir -p ~/openvpn/client1
# client.conf 如果client.conf不存在,需要对目录下的
cp /usr/share/doc/openvpn/examples/sample-config-files/client.conf ~/openvpn/client1/client1.ovpn
复制证书及密钥文件
然后将CA的证书、客户端的证书和密钥,以及Diffie-Hellman参数文件复制到 ~/openvpn/client1 目录下
cp /etc/openvpn/server/easy-rsa/pki/ca.crt ~/openvpn/client1/ca.crt
cp /etc/openvpn/server/easy-rsa/ta.key ~/openvpn/client1/ta.key
cp /etc/openvpn/server/easy-rsa/pki/private/client1.key ~/openvpn/client1/client1.key
cp /etc/openvpn/server/easy-rsa/pki/issued/client1.crt ~/openvpn/client1/client1.crt
编辑配置文件
编辑client1.ovpn配置,去除无用配置项
client
dev tun
proto tcp
# remote <服务器端IP> <服务器端端口>
remote 192.168.xx.xx 1194
resolv-retry infinite
# Most clients don't need to bind to
# a specific local port number.
nobind
persist-key
persist-tun
ca ca.crt
cert client1.crt
key client1.key
remote-cert-tls server
tls-auth ta.key 1
comp-lzo
verb 5

# 不拉取服务端路由配置,可选可不选。
route-nopull
# 指定访问哪些网段走vpn隧道
route 192.168.0.0 255.255.0.0 vpn_gateway
打包客户端配置文件
cd ~/openvpn
tar -zcvf client1.tar.gz ./client1
使用OpenVPN Connect客户端
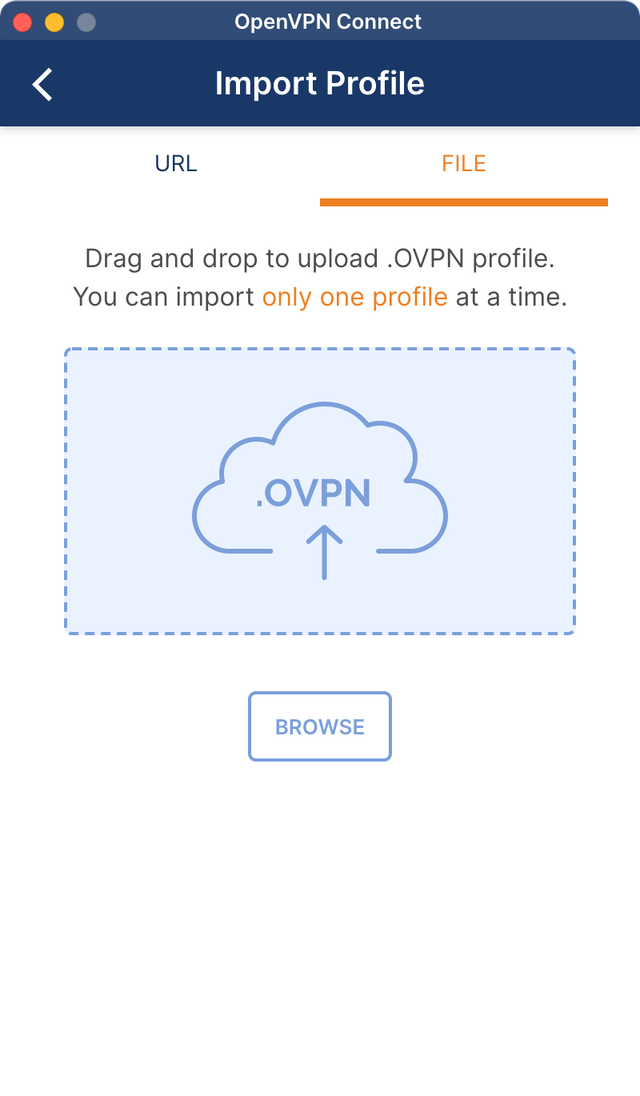
使用OpenVPN Connect客户端连接服务
