Mysql数据备份与恢复
前言
看完本文,删库跑路!? 再也不可能发生了!一定要养成风险操作备份数据的习惯,避免恢复数据浪费时间。
本文内容:
- binlog 的作用
- MySQLdump 和 mysqlbinlog 做数据备份和数据恢复。
- XtraBackup 全量备份和增量备份
binlog

binlog 作用及配置
Mysql 的 binlog (二进制日志) 是 Server 层的,不管你的存储引擎是什么都可以使用 binlog 。
binlog 记录的是数据库 DML 和 DDL 修改的数据内容,也可以用于数据的备份与恢复。一般我们会用
binlog 也用于主从复制,从库请求主库的 binlog 写入到自己的中继日志,然后将中继日志转换为 sql ,然后将 sql 执行在从库执行。
-- 查看是否开启 binlog
SHOW VARIABLES LIKE '%log_bin%'

mysql> SHOW VARIABLES LIKE '%log_bin%';
+---------------------------------+-----------------------------+
| Variable_name                   | Value                       |
+---------------------------------+-----------------------------+
| log_bin                         | ON                          |
| log_bin_basename                | /var/lib/mysql/binlog       |
| log_bin_index                   | /var/lib/mysql/binlog.index |
| log_bin_trust_function_creators | OFF                         |
| log_bin_use_v1_row_events       | OFF                         |
| sql_log_bin                     | ON                          |
+---------------------------------+-----------------------------+
开启二进制日志配置
log_bin 配置是否启用 binlog。Mysql 8.0 默认开启 binlog。
log_bin_index 配置的是 binlog 日志文件的索引信息。这个配置最好配置了之后不要修改。
log_bin_basename 配置的是 binlog 日志的基础路径名称。
server_id 这个也需要配置,在一个集群中这个数字不能重复。
sql_log_bin 配置当前会话 DML 和 DDL 语句是否记录。
[root@centos-7 mysql]# pwd
/var/lib/mysql
[root@centos-7 mysql]# ll | grep binlog
-rw-r-----. 1 mysql mysql    16162 11月 21 15:58 binlog.000013
-rw-r-----. 1 mysql mysql      179 11月 21 15:58 binlog.000014
-rw-r-----. 1 mysql mysql     3765 11月 22 14:42 binlog.000015
-rw-r-----. 1 mysql mysql     1700 11月 23 23:40 binlog.000016
-rw-r-----. 1 mysql mysql       64 11月 22 14:42 binlog.index
[root@centos-7 mysql]#
binlog 日志格式
-- 查看当前 binlog 文件存储什么数据
SHOW VARIABLES LIKE '%binlog_format%';
binlog 日志格式有以下三种
STATEMENT
记录的是 sql 语句。
ROW
Mysql 8.0 默认采用这个格式。记录每行的修改。相较于 STATEMENT 它可能记录的内容会更多,但是主从复制时更安全。
比如全表更新 update test set a=1; STATEMENT 只会记录这个 sql ,而 ROW 会记录所有数据的修改。
MIXED
当需要时,Mysql 将日志格式从 STATEMENT 切换为 ROW。
比如说更新语句可能记录为逻辑 sql (STATEMENT),而插入语句记录为(ROW) 格式。
binlog 日志格式验证
创建一张表,插入 10 w 数据
DROP TABLE IF EXISTS `account`;
CREATE TABLE `account` (
  `id` int NOT NULL AUTO_INCREMENT,
  `username` varchar(255) DEFAULT NULL,
  `age` int DEFAULT NULL,
  PRIMARY KEY (`id`)
) ENGINE=InnoDB AUTO_INCREMENT=100000 DEFAULT CHARSET=utf8mb4 COLLATE=utf8mb4_0900_ai_ci;
DROP PROCEDURE if EXISTS insertData;
CREATE PROCEDURE insertData ( )
BEGIN
    DECLARE i INT DEFAULT 1;
    WHILE i < 10000 DO
        SET i = i + 1;
        INSERT INTO account ( username, age )VALUES( '测试', 12 );
    END WHILE;
END;
CALL insertData ( );
binlog_format在ROW模式下记录的是每行数据的修改
mysql> SHOW BINLOG EVENTS IN 'binlog.000018' limit 10;
+---------------+-------+----------------+-----------+-------------+--------------------------------------+
| Log_name      | Pos   | Event_type     | Server_id | End_log_pos | Info                                 |
+---------------+-------+----------------+-----------+-------------+--------------------------------------+
| binlog.000018 |     4 | Format_desc    |         1 |         125 | Server ver: 8.0.21, Binlog ver: 4    |
| binlog.000018 |   125 | Previous_gtids |         1 |         156 |                                      |
| binlog.000018 |   156 | Anonymous_Gtid |         1 |         236 | SET @@SESSION.GTID_NEXT= 'ANONYMOUS' |
| binlog.000018 |   236 | Query          |         1 |         322 | BEGIN                                |
| binlog.000018 |   322 | Table_map      |         1 |         386 | table_id: 99 (ceshi2.account)        |
| binlog.000018 |   386 | Update_rows    |         1 |        8600 | table_id: 99                         |
| binlog.000018 |  8600 | Update_rows    |         1 |       16814 | table_id: 99                         |
| binlog.000018 | 16814 | Update_rows    |         1 |       25028 | table_id: 99                         |
| binlog.000018 | 25028 | Update_rows    |         1 |       33242 | table_id: 99                         |
| binlog.000018 | 33242 | Update_rows    |         1 |       41456 | table_id: 99                         |
+---------------+-------+----------------+-----------+-------------+--------------------------------------+
binlog_format在STATEMENT模式下记录的是 sql
flush logs;

update ceshi2.account set username='2';

mysql> SHOW BINLOG EVENTS IN 'binlog.000019' limit 10;
+---------------+-----+----------------+-----------+-------------+----------------------------------------+
| Log_name      | Pos | Event_type     | Server_id | End_log_pos | Info                                   |
+---------------+-----+----------------+-----------+-------------+----------------------------------------+
| binlog.000019 |   4 | Format_desc    |         1 |         125 | Server ver: 8.0.21, Binlog ver: 4      |
| binlog.000019 | 125 | Previous_gtids |         1 |         156 |                                        |
| binlog.000019 | 156 | Anonymous_Gtid |         1 |         235 | SET @@SESSION.GTID_NEXT= 'ANONYMOUS'   |
| binlog.000019 | 235 | Query          |         1 |         324 | BEGIN                                  |
| binlog.000019 | 324 | Query          |         1 |         446 | update ceshi2.account set username='2' |
| binlog.000019 | 446 | Xid            |         1 |         477 | COMMIT /* xid=300671 */                |
+---------------+-----+----------------+-----------+-------------+----------------------------------------+
binlog 操作
查看所有的 binlog
-- 查看链接的数据库 binlog 文件信息
SHOW BINARY LOGS;
SHOW MASTER LOGS;

mysql> SHOW BINARY LOGS;
+---------------+-----------+-----------+
| Log_name      | File_size | Encrypted |
+---------------+-----------+-----------+
| binlog.000013 |     16162 | No        |
| binlog.000014 |       179 | No        |
| binlog.000015 |      3765 | No        |
| binlog.000016 |      1700 | No        |
+---------------+-----------+-----------+
查看当前正在写入的 binlog
-- 查看当前正在写入的 binlog 文件信息
SHOW MASTER STATUS;

mysql> SHOW MASTER STATUS;
+---------------+----------+--------------+------------------+-------------------+
| File          | Position | Binlog_Do_DB | Binlog_Ignore_DB | Executed_Gtid_Set |
+---------------+----------+--------------+------------------+-------------------+
| binlog.000016 |     1700 |              |                  |                   |
+---------------+----------+--------------+------------------+-------------------+
1 row in set (0.00 sec)
生成新的 binlog
-- 刷新产生新的日志文件
FLUSH LOGS;

-- 原来的日志文件是 binlog.000016
mysql> SHOW MASTER STATUS;
+---------------+----------+--------------+------------------+-------------------+
| File          | Position | Binlog_Do_DB | Binlog_Ignore_DB | Executed_Gtid_Set |
+---------------+----------+--------------+------------------+-------------------+
| binlog.000017 |      156 |              |                  |                   |
+---------------+----------+--------------+------------------+-------------------+
1 row in set (0.00 sec)
查看 binlog 中的操作
SHOW BINLOG EVENTS
   [IN 'log_name']
   [FROM pos]
   [LIMIT [offset,] row_count]

mysql> show binlog events limit 100,3;
+---------------+------+----------------+-----------+-------------+-------------------------------------------------------------------------------------+
| Log_name      | Pos  | Event_type     | Server_id | End_log_pos | Info                                                                                |
+---------------+------+----------------+-----------+-------------+-------------------------------------------------------------------------------------+
| binlog.000013 | 9382 | Query          |         1 |        9539 | use `ceshi`; GRANT SELECT ON `ceshi`.`test2` TO 'db_dev'@'localhost' /* xid=1023 */ |
| binlog.000013 | 9539 | Anonymous_Gtid |         1 |        9616 | SET @@SESSION.GTID_NEXT= 'ANONYMOUS'                                                |
| binlog.000013 | 9616 | Query          |         1 |        9711 | use `ceshi`; FLUSH PRIVILEGES                                                       |
+---------------+------+----------------+-----------+-------------+-------------------------------------------------------------------------------------+
binlog 落盘时机
Mysql 中有很多 Buffer Pool (可以简单理解为内存),为了提高数据库性能,一般提交事务之后,二进制日志先写入 Buffer Poll ,在写入到二进制文件中。
如果二进制日志没有落盘,那么二进制日志有可能丢失,从库进行复制时会丢失数据。
参数 sync_binlog 配置写入 Buffer Poll 多少次的时候调用系统调用 fsync 将内存中的二进制日志数据落盘。
sync_binlog=1表示提交事务的时候同步将二进制日志数据落盘。配合innodb_flush_log_at_trx_commit=1(控制 redo log 落盘) 数据安全。sync_binlog=N表示提交了 N 个二进制数据时才将日志数据落盘。也有人将其设置为 2,提高并发性,系统崩溃时可能丢失二进制日志数据。sync_binlog=0表示由操作系统 IO 调度来决定日志什么时候落盘。一般没人采用这个。
Mysql 备份和恢复
为了避免意外情况发生导致数据丢失,数据库需要定时全备和增量备份。以便于可以将数据库恢复到任意时间点的数据。
根据备份方法的不同可以划分为:
- 热备(Hot Backup)
- 冷备 (Clod Backup)
热备是在数据库正在运行时直接备份,对业务的影响不大。
冷备需要停止 Mysql 进行备份,速度较快。可以在从库进行冷备。
根据备份后的文件内容可以划分为:
- 逻辑备份,数据库执行的 sql 内容
- 文件备份,备份数据库的物理文件
一般我们会定时对数据执行备份脚本,然后将备份的内容压缩发送到存储文件的服务器,比如 OSS 。
备份与恢复使用到程序
- mysqldump,对数据库进行不停机执行逻辑备份及恢复
- mysqlbinlog,操作 binlog 日志,使数据恢复到某个时间点的数据
- xtrabackup,percona 开源工具,对数据库不停机进行文件备份
mysqldump 使用
备份某些数据库
mysqldump --master-data --single-transaction --databases ceshi2 ceshi -h10.211.55.8 -uroot -pMysql@12345678 > backup.sql
备份所有数据库
mysqldump --master-data --single-transaction --all-databases -h10.211.55.8 -uroot -pMysql@12345678 > backup.sql
参数说明
-
--single-transaction用于全是InnoDB表的备份。备份开始执行前START TRANSACTION会开启事务,由于MVCC的特性这种备份不会影响数据库读写,而且还保证了备份期间数据的一致性 -
--master-data为 1 时记录CHANGE MASTER语句,可以在从库中使用备份的文件,比如新增加一个从库,就可以在从库上执行这个备份的数据。为 2 时 会注释CHANGE MASTER。 -
--lock-tables锁住单个数据库中所有表,只允许读取数据。为了保证备份时数据的一致性。因为只能锁住单个数据库,如果有多个数据库就不能保证数据的一致性了。当数据库采用的存储引擎既有InnoDB和MyISAM时需要使用这个属性 -
--lock-all-tables锁住备份所有数据库的表,能保证多个数据库数据的一致性。 -
--databases可以指定备份哪些数据库实例 -
--all-databases备份连接中所有的数据库实例。 -
--evnets备份事件调度器 -
--routines备份存储过程和存储函数 -
--triggers备份触发器 -
--flush-logs导出之前刷新日志,因为有的数据在内存中,可能还没有写入到二进制日志中
mysqlbinlog 使用
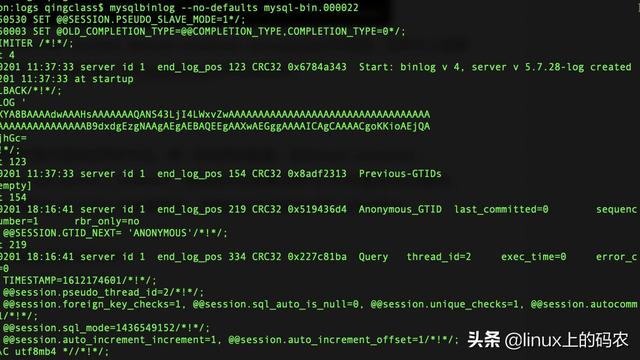
mysqlbinlog 可以解析 binlog 生成 sql语句。
# 在本地生成 sql
mysqlbinlog --disable-log-bin /Users/zhangpanqin/Desktop/binlog.000019 > test.sql
mysqlbinlog --disable-log-bin /Users/zhangpanqin/Desktop/binlog.000019 > test.sql

# 根据日志的位置
mysqlbinlog binlog.000019 --disable-log-bin --start-position 775 > 775.sql
mysqlbinlog binlog.000019 --disable-log-bin --start-position 477 --stop-position 556 > 477-556.sql

# 根据时间
mysqlbinlog binlog.000019 --start-date='2017-12-19 10:10:00' --stop-date='2017-12-19 18:52:00' > aa.sql

# 链接远程使用
mysqlbinlog --disable-log-bin --read-from-remote-server  --host=10.211.55.8 --user=root --password=Mysql@12345678 binlog.000019 binlog.000020> remote_test.sql
--start-position指定从哪个位置开始--stop-position指定从哪个位置开始--start-datetime指定开始时间--stop-datetime指定结束时间--disable-log-bin生成的 sql 语句中,添加SET SQL_LOG_BIN=0,执行转换的 sql 时,不会生成二进制日志--read-from-remote-server从远程服务器读取
数据恢复
一般我们会使用 mysqldump 进行一个全量备份,在这个全量备份的基础上,从 binlog 提取后续 sql 进行数据恢复。
模拟一个场景
1、比如我们在某个 2020-11-28 16:30:00 进行了全量备份。
2、2020-11-28 16:35:00 删除了 account 表中全部数据
3、删除之后不知道,又插入了两条数据
INSERT INTO `ceshi2`.`account`(`id`, `username`, `age`) VALUES (11111111, '删除全库之后插入', 11);
INSERT INTO `ceshi2`.`account`(`id`, `username`, `age`) VALUES (11111112, 'asdfasd', 12);
恢复数据的时候,为避免恢复操作写入到二进制日志中去,需要暂时关闭二进制日志,恢复会话期间不写入二进制日志
SET SQL_LOG_BIN=0;
SHOW VARIABLES LIKE '%sql_log_bin%';
现在开始对数据库进行数据恢复
- 开始恢复之前先
flush logs刷新新的二进制日志
mysql> show master status;
+---------------+----------+--------------+------------------+-------------------+
| File          | Position | Binlog_Do_DB | Binlog_Ignore_DB | Executed_Gtid_Set |
+---------------+----------+--------------+------------------+-------------------+
| binlog.000020 |      156 |              |                  |                   |
+---------------+----------+--------------+------------------+-------------------+
- 设置当前会话不记录二进制日志,并恢复全备数据
(echo "SET SQL_LOG_BIN=0;";cat /Users/zhangpanqin/Desktop/backup.sql) | mysql -u root -h 10.211.55.8 -pMysql@12345678 -f
- 查看 backup.sql 记录的是什么时候备份的数据
/*CHANGE MASTER TO MASTER_LOG_FILE='binlog.000019', MASTER_LOG_POS=477;*/
- 使用 mysqlbinlog 导出
binlog从位置477开始的 sql
-- 笨的方法就是,查看删除的 sql 语句
SHOW BINLOG EVENTS IN 'binlog.000019' FROM 477 LIMIT 0,10;

mysql> SHOW BINLOG EVENTS IN 'binlog.000019' FROM 477 LIMIT 0,10;
+---------------+------+----------------+-----------+-------------+-------------------------------------------------------------------------------------------------------------------------+
| Log_name      | Pos  | Event_type     | Server_id | End_log_pos | Info                                                                                                                    |
+---------------+------+----------------+-----------+-------------+-------------------------------------------------------------------------------------------------------------------------+
| binlog.000019 |  477 | Anonymous_Gtid |         1 |         556 | SET @@SESSION.GTID_NEXT= 'ANONYMOUS'                                                                                    |
| binlog.000019 |  556 | Query          |         1 |         642 | BEGIN                                                                                                                   |
| binlog.000019 |  642 | Query          |         1 |         744 | use `ceshi2`; DELETE FROM `account`                                                                                     |
| binlog.000019 |  744 | Xid            |         1 |         775 | COMMIT /* xid=300922 */                                                                                                 |
| binlog.000019 |  775 | Anonymous_Gtid |         1 |         854 | SET @@SESSION.GTID_NEXT= 'ANONYMOUS'                                                                                    |
| binlog.000019 |  854 | Query          |         1 |         940 | BEGIN                                                                                                                   |
| binlog.000019 |  940 | Query          |         1 |        1126 | use `ceshi2`; INSERT INTO `ceshi2`.`account`(`id`, `username`, `age`) VALUES (11111111, '删除全库之后插入', 11)         |
| binlog.000019 | 1126 | Xid            |         1 |        1157 | COMMIT /* xid=301033 */                                                                                                 |
| binlog.000019 | 1157 | Anonymous_Gtid |         1 |        1236 | SET @@SESSION.GTID_NEXT= 'ANONYMOUS'                                                                                    |
| binlog.000019 | 1236 | Query          |         1 |        1322 | BEGIN                                                                                                                   |
+---------------+------+----------------+-----------+-------------+-------------------------------------------------------------------------------------------------------------------------+
 -- 导出 477-556 之间的 sql
 mysqlbinlog binlog.000019 --start-position 477 --stop-position 556 > 477-556.sql
  -- 导出 从 775 开始的 sql
 mysqlbinlog binlog.000019 --start-position 775> 775.sql
这里比较好的做法就是直接使用工具直接解析 sql
https://github.com/danfengcao/binlog2sql
- 执行剩下的 sql
(echo "SET SQL_LOG_BIN=0;";cat /Users/zhangpanqin/Desktop/477-556.sql) | mysql -u root -h 10.211.55.8 -pMysql@12345678 -f
(echo "SET SQL_LOG_BIN=0;";cat /Users/zhangpanqin/Desktop/775.sql) | mysql -u root -h 10.211.55.8 -pMysql@12345678 -f
- 查看 binlog 日志,没有添加二进制日志到数据库中,不影响从库
mysql> SHOW MASTER STATUS;
+---------------+----------+--------------+------------------+-------------------+
| File          | Position | Binlog_Do_DB | Binlog_Ignore_DB | Executed_Gtid_Set |
+---------------+----------+--------------+------------------+-------------------+
| binlog.000020 |      156 |              |                  |                   |
+---------------+----------+--------------+------------------+-------------------+
XtraBackup 使用
XtraBackup 只能备份InnoDB和XtraDB 两种数据表。
安装
系统环境:Centos 7 x86_64
数据库:Mysql 8.0.21
由以上环境决定了 xtrabackup 需要安装 8.0.14 版本。
https://www.percona.com/doc/percona-xtrabackup/8.0/installation/yum_repo.html
wget https://downloads.percona.com/downloads/Percona-XtraBackup-LATEST/Percona-XtraBackup-8.0.14/binary/redhat/7/x86_64/percona-xtrabackup-80-8.0.14-1.el7.x86_64.rpm

yum localinstall percona-xtrabackup-80-8.0.14-1.el7.x86_64.rpm

# 验证版本
xtrabackup --version
命令讲解
--backup备份操作,备份数据到--target-dir指定的目录。--prepare恢复数据执行的阶段。--use-memory指定备份时占用的内存,--use-memory=4G。--copy-back将准备好的数据文件复制到 mysql datadir 目录。- ``--Apply-log-only` 阻止回滚未完成的事务
全量备份
创建备份使用的用户
CREATE USER 'xtrabackup'@'localhost' IDENTIFIED BY 'Mysql@12345678';
GRANT BACKUP_ADMIN, PROCESS, RELOAD, LOCK TABLES, REPLICATION CLIENT ON *.* TO 'xtrabackup'@'localhost';
GRANT SELECT ON performance_schema.log_status TO 'xtrabackup'@'localhost';
FLUSH PRIVILEGES;
xtrabackup 全量备份
xtrabackup --host=localhost --user=xtrabackup --password=Mysql@12345678 --backup --target-dir=/opt/test22/backup
全量数据恢复
# 先停止数据库
systemctl stop mysqld

# 恢复数据执行的准备
xtrabackup  --host=localhost --user=xtrabackup --password=Mysql@12345678 --prepare  --target-dir=/opt/test22/backup

# 备份数据库文件,并删除数据库数据目录下的文件
cp -r /var/lib/mysql{,"$(date '+%Y-%m-%d %H:%M:%S')"_bak} && rm -fr /var/lib/mysql/*
# 恢复数据
xtrabackup  --host=localhost --user=xtrabackup --password=Mysql@12345678 --copy-back --target-dir=/opt/test22/backup
# 查看 /var/lib/mysql 目录下所有文件的所属人,需要改成 mysqld 运行的用户
chown -R mysql:mysql /var/lib/mysql
# 启动 mysql 数据库
systemctl start mysqld
增量备份
在全量备份的基础上,增量备份。
增量备份
# 创建全量备份在那个目录下
mkdir -p /opt/xtrabackup_mysql/full_data_dir
# 全量基础之后的增量数据一次
mkdir -p /opt/xtrabackup_mysql/increment_data_dir
# 在上一次增量备份的基础上在增量备份一次
mkdir -p /opt/xtrabackup_mysql/increment_data_dir_2

# 全量备份
xtrabackup --defaults-file=/etc/my.cnf  --host=localhost --user=xtrabackup --password=Mysql@12345678 --backup --parallel=3  --target-dir=/opt/xtrabackup_mysql/full_data_dir

# 全量备份之后,操作数据。

# 做增量备份
xtrabackup --defaults-file=/etc/my.cnf --host=localhost --user=xtrabackup --password=Mysql@12345678 --backup --parallel=3  --target-dir=/opt/xtrabackup_mysql/increment_data_dir --incremental-basedir=/opt/xtrabackup_mysql/full_data_dir

# 操作了数据之后,在上一次增量备份基础上做第二次增量备份
xtrabackup --defaults-file=/etc/my.cnf --host=localhost --user=xtrabackup --password=Mysql@12345678 --backup --parallel=3  --target-dir=/opt/xtrabackup_mysql/increment_data_dir_2 --incremental-basedir=/opt/xtrabackup_mysql/increment_data_dir
增量备份数据恢复
# 停止数据库
systemctl stop mysqld

# 准备全备份日志数据
xtrabackup --defaults-file=/etc/my.cnf --prepare --apply-log-only --target-dir=/opt/xtrabackup_mysql/full_data_dir

# 合并第一次增量备份数据到全量中,注意路径别写错了
xtrabackup --defaults-file=/etc/my.cnf --prepare --apply-log-only --target-dir=/opt/xtrabackup_mysql/full_data_dir  --incremental-dir=/opt/xtrabackup_mysql/increment_data_dir

# 合并第二次增量备份数据到全量中,注意路径。最后一次不需要添加 --apply-log-only
xtrabackup --defaults-file=/etc/my.cnf --prepare  --target-dir=/opt/xtrabackup_mysql/full_data_dir  --incremental-dir=/opt/xtrabackup_mysql/increment_data_dir_2


# 将原来数据库备份
cp -r /var/lib/mysql{,"$(date '+%Y-%m-%d %H:%M:%S')"_bak} && rm -fr /var/lib/mysql/*

-- 拷回数据
xtrabackup --defaults-file=/etc/my.cnf --copy-back --target-dir=/opt/xtrabackup_mysql/full_data_dir
# 修改mysql 数据文件的权限为 mysql
chown -R mysql:mysql /var/lib/mysql
# 启动数据库
systemctl start mysqld
本文由 张攀钦的博客 http://www.mflyyou.cn/ 创作。 可自由转载、引用,但需署名作者且注明文章出处。
如转载至微信公众号,请在文末添加作者公众号二维码。微信公众号名称:Mflyyou


