MyBatis-Plus 用起来真的很舒服
MyBatis-Plus(简称 MP)是一个 MyBatis的增强工具,在 MyBatis 的基础上只做增强不做改变,为简化开发、提高效率而生。
整合SpringBoot
创建数据库和数据表:
CREATE DATABASE mybatisplus;

CREATE TABLE tbl_employee(
 id INT(11) PRIMARY KEY AUTO_INCREMENT,
 last_name VARCHAR(255),
 email VARCHAR(255),
 gender CHAR(1),
 age INT(11)
);

INSERT INTO tbl_employee(last_name,email,gender,age) VALUES('tom','tom@qq.com',1,20);
INSERT INTO tbl_employee(last_name,email,gender,age) VALUES('jack','jack@qq.com',1,21);
INSERT INTO tbl_employee(last_name,email,gender,age) VALUES('jerry','jerry@qq.com',0,22);
INSERT INTO tbl_employee(last_name,email,gender,age) VALUES('smith','smith@qq.com',0,23);

创建数据表对应的Bean类:
@Data
@NoArgsConstructor
@AllArgsConstructor
public class Employee {

    private Integer id;
    private String lastName;
    private String email;
    private Integer gender;
    private Integer age;
}

添加依赖:
<dependency>
  <groupId>org.springframework.boot</groupId>
  <artifactId>spring-boot-starter</artifactId>
</dependency>
<dependency>
  <groupId>org.projectlombok</groupId>
  <artifactId>lombok</artifactId>
</dependency>
<dependency>
  <groupId>com.baomidou</groupId>
  <artifactId>mybatis-plus-boot-starter</artifactId>
  <version>3.3.1</version>
</dependency>
<dependency>
  <groupId>MySQL</groupId>
  <artifactId>mysql-connector-JAVA</artifactId>
</dependency>
<dependency>
  <groupId>com.alibaba</groupId>
  <artifactId>druid-spring-boot-starter</artifactId>
  <version>1.1.13</version>
</dependency>

配置数据源:
spring:
  datasource:
    url: jdbc:mysql:///mybatisplus?serverTimezone=UTC
    driver-class-name: com.mysql.cj.jdbc.Driver
    username: root
    password: 123456
    type: com.alibaba.druid.pool.DruidDataSource

mybatis-plus:
  configuration:
    log-impl: org.Apache.ibatis.logging.stdout.StdOutImpl # 输出sql

最后在启动类上添加MApper接口扫描注解:
@SpringBootApplication
@MapperScan("com.wwj.mybatisplusdemo.mapper")
public class MybatisplusDemoApplication {
    public static void main(String[] args) {
        SpringApplication.run(MybatisplusDemoApplication.class, args);
    }
}

通用CRUD
回想一下传统的MyBatis开发,若是想要实现员工信息的增删改查,该如何实现?我们需要编写Mapper接口,并创建对应的映射文件,然后配置每一个接口方法对应的sql,对于一些非常简单的操作,这些步骤显然非常麻烦,那么有没有可能让这些简单的增删改查自动实现呢?MyBatisPlus帮我们实现了这个想法,在MyBatisPlus中,我们只需要创建Mapper接口并继承BaseMapper即可获得员工表的增删改查方法。
创建Mapper接口:
public interface EmployeeMapper extends BaseMapper<Employee> {
}

既然继承了BaseMapper接口就拥有了增删改查方法,那么这些方法肯定是从BaseMapper中继承下来的,所以来看看BaseMapper的源码:
public interface BaseMapper<T> extends Mapper<T> {
    int insert(T entity);
    int deleteById(Serializable id);
    int deleteByMap(@Param(Constants.COLUMN_MAP) Map<String, Object> columnMap);
    int delete(@Param(Constants.WRAPPER) Wrapper<T> wrapper);
    int deleteBatchIds(@Param(Constants.COLLECTION) Collection<? extends Serializable> idList);
    int updateById(@Param(Constants.ENTITY) T entity);
    int update(@Param(Constants.ENTITY) T entity, @Param(Constants.WRAPPER) Wrapper<T> updateWrapper);
    T selectById(Serializable id);
    List<T> selectBatchIds(@Param(Constants.COLLECTION) Collection<? extends Serializable> idList);
    List<T> selectByMap(@Param(Constants.COLUMN_MAP) Map<String, Object> columnMap);
    T selectOne(@Param(Constants.WRAPPER) Wrapper<T> queryWrapper);
    Integer selectCount(@Param(Constants.WRAPPER) Wrapper<T> queryWrapper);
    List<T> selectList(@Param(Constants.WRAPPER) Wrapper<T> queryWrapper);
    List<Map<String, Object>> selectMaps(@Param(Constants.WRAPPER) Wrapper<T> queryWrapper);
    List<Object> selectObjs(@Param(Constants.WRAPPER) Wrapper<T> queryWrapper);
    <E extends IPage<T>> E selectPage(E page, @Param(Constants.WRAPPER) Wrapper<T> queryWrapper);
    <E extends IPage<Map<String, Object>>> E selectMapsPage(E page, @Param(Constants.WRAPPER) Wrapper<T> queryWrapper);
}

该接口定义了非常多的方法,
新增
接下来我们使用MyBatisPlus实现一下员工信息的增删改查,首先是新增操作:
@Autowired
private EmployeeMapper employeeMapper;

@Test
void contextLoads() {
    Employee employee = new Employee(null,"aaa","aaa@qq.com",1,30);
    employeeMapper.insert(employee);
}

然后执行该方法会产生一个异常:
org.mybatis.spring.MyBatisSystemException: nested exception is org.apache.ibatis.reflection.ReflectionException: Could not set property 'id' of 'class com.wwj.mybatisplusdemo.bean.Employee' with value '1364829918590943234' Cause: java.lang.IllegalArgumentException: argument type mismatch

这是因为我们没有为MyBatisPlus指定主键策略,MyBatisPlus共支持以下四种主键策略:
|
值 |
描述 |
|
AUTO |
数据库ID自增 |
|
INPUT |
insert前自行set主键值 |
|
ASSIGN_ID |
分配ID(主键类型为Number(Long和Integer)或String)(since 3.3.0),使用接口IdentifierGenerator的方法nextId(默认实现类为 |
|
ASSIGN_UUID |
分配UUID,主键类型为String(since 3.3.0),使用接口IdentifierGenerator的方法nextUUID(默认default方法) |
只需在主键属性上添加@TableId注解即可设置主键策略:
@Data
@NoArgsConstructor
@AllArgsConstructor
public class Employee {

    @TableId(type = IdType.AUTO)
    private Integer id;
    private String lastName;
    private String email;
    private Integer gender;
    private Integer age;
}

此时执行方法仍然出现一个异常:
### Cause: java.sql.SQLSyntaxErrorException: Table 'mybatisplus.employee' doesn't exist
; bad SQL grammar []; nested exception is java.sql.SQLSyntaxErrorException: Table 'mybatisplus.employee' doesn't exist

这是因为我们的实体类名为Employee,数据表名为tbl_employee,而MyBatisPlus默认会以实体类名去数据库中寻找对应的表,导致二者无法进行映射,为此,我们还需要设置一下实体类对应的表名:
@Data
@NoArgsConstructor
@AllArgsConstructor
@TableName("tbl_employee")
public class Employee {

    @TableId(type = IdType.AUTO)
    private Integer id;
    private String lastName;
    private String email;
    private Integer gender;
    private Integer age;
}

在刚才的案例中,我们发现实体类中的属性lastName和数据表的列名last_name并不相同,但是新增数据仍然成功了,而且我们也并没有配置任何与属性名映射相关的配置,其实是因为MyBatisPlus有默认的全局策略配置,在MyBatisConfiguration配置类中有这样的一段配置:
public MybatisConfiguration() {
    super();
    this.mapUnderscoreToCamelCase = true;
    languageRegistry.setDefaultDriverClass(MybatisXMLLanguageDriver.class);
}

这是配置类的无参构造方法,它将mapUnderscoreToCamelCase属性设置为true,而我们知道,该属性为true则会开启驼峰命名,所以驼峰命名映射是默认开启的,若是想关闭,则设置该属性为false即可:
mybatis-plus:
  configuration:
    map-underscore-to-camel-case: false

我们还发现,在实体类上标注@TableId和@TableName注解让人非常不愉快,并且当实体类足够多时,这也是一个繁琐且麻烦的操作,为此,我们可以使用全局配置来解决这一问题,查看GlobalConfig类的源码,它是MyBatisPlus的全局策略配置类:
@Data
public static class DbConfig {
    /**
      * 主键类型
      */
    private IdType idType = IdType.ASSIGN_ID;
}

在源码中找到这样一段配置,说明MyBatisPlus默认的主键策略是 分配ID ,所以我们需要将其配置为主键自增:
mybatis-plus:
  global-config:
    db-config:
      id-type: auto

表名的映射也可以进行全局配置:
mybatis-plus:
  global-config:
    db-config:
      id-type: auto
      table-prefix: tbl_

此时就可以将实体类上的@TableId和@TableName注解去掉了。
驼峰命名映射只能解决诸如lastName和last_name的映射关系,当两者差别过大时,比如:lastName和name,此时我们需要使用@TableField注解来解决:
@TableField(value = "name")
private String lastName;

但通常情况下数据表的列名和实体类的属性名一定是驼峰命名映射或者完全相同的,所以该注解一般用于另外一种场景,即:当前实体类中有些属性在数据表中是不存在的,此时就会出现异常,而@TableField注解能够通过属性设置来声明某个属性是数据表中不存在的属性,这样MyBatisPlus在生成sql语句时就不会带上它:
@TableField(exist = false)
private Integer salary;

更新
更新操作也非常简单,直接调用自动生成的方法即可:
@Autowired
private EmployeeMapper employeeMapper;

@Test
void contextLoads() {
    Employee employee = new Employee(5,"bbb","bbb@qq.com",1,30,3000);
    employeeMapper.updateById(employee);
}

该方法是根据id进行员工信息的更新,所以id属性不能为空,而且它会根据属性是否为空动态生成sql,即:只更新不为空的属性值。
查询
查询是最为频繁的操作,故提供的查询方法也最多,先来看看selectById方法:
@Autowired
private EmployeeMapper employeeMapper;

@Test
void contextLoads() {
    Employee employee = employeeMapper.selectById(1);
    System.out.println(employee);
}

该方法通过id值查询员工信息。然后是selectBatchIds方法:
@Autowired
private EmployeeMapper employeeMapper;

@Test
void contextLoads() {
    List<Employee> emps = employeeMapper.selectBatchIds(Arrays.asList(1, 2, 3));
    for (Employee emp : emps) {
        System.out.println(emp);
    }
}

该方法是批量查询方法,通过一个id的集合查询这些id的所属员工信息。selectByMap方法:
@Autowired
private EmployeeMapper employeeMapper;

@Test
void contextLoads() {
    Map<String,Object> map = new HashMap<>();
    map.put("last_name","tom");
    map.put("gender",1);
    List<Employee> emps = employeeMapper.selectByMap(map);
    for (Employee emp : emps) {
        System.out.println(emp);
    }
}

该方法仍然是一个批量查询,通过Map封装查询条件,需要注意Map中的键为数据表中的字段名而非实体类中的属性名。
删除
最后来看看删除操作:
@Autowired
private EmployeeMapper employeeMapper;

@Test
void contextLoads() {
    employeeMapper.deleteById(10);
}

根据id删除员工信息。然后是deleteByMap方法:
@Autowired
private EmployeeMapper employeeMapper;

@Test
void contextLoads() {
    Map<String,Object> map = new HashMap<>();
    map.put("last_name","aaa");
    employeeMapper.deleteByMap(map);
}

该方法通过Map集合封装的条件进行删除,Map中的键也为数据表的列名。deleteBatchIds方法:
@Autowired
private EmployeeMapper employeeMapper;

@Test
void contextLoads() {
    employeeMapper.deleteBatchIds(Arrays.asList(1,2,3));
}

该方法是批量删除方法,会删除集合中的所有id对应的员工信息。
条件构造器
刚才我们体验了MyBatisPlus的增删改查操作,不过这都是一些最基本的操作方法,对于查询,MyBatis提供了一个条件构造器——QueryWrapper,使用它能够自由构建查询条件,简单便捷,能够极大提升开发效率。
现在有一个需求,查询年龄在10~30岁之间的员工信息,并分页显示:
@Test
void contextLoads() {
    QueryWrapper<Employee> wrapper = new QueryWrapper<>();
    wrapper.between("age", 10, 30);
    Page<Employee> page = employeeMapper.selectPage(new Page<>(1, 2), wrapper);
    List<Employee> emps = page.getRecords();
    for (Employee emp : emps) {
        System.out.println(emp);
    }
}

首先构造QueryWrapper对象,通过between拼接sql,注意其中的参数必须是表字段名,然后通过selectPage方法进行分页查询,分页规则为 new Page<>(1,2) ,即:按每页两行数据进行分页,显示第一页,最后从Page对象中取出数据即可,不要忘记注册一下分页拦截器:
@Configuration
public class MyBatisConfig {

    @Bean
    public PaginationInterceptor paginationInterceptor() {
        return new PaginationInterceptor();
    }
}

执行结果:
==>  Preparing: SELECT COUNT(1) FROM tbl_employee WHERE (age BETWEEN ? AND ?)
==> Parameters: 10(Integer), 30(Integer)
<==    Columns: COUNT(1)
<==        Row: 5
==>  Preparing: SELECT id,last_name,email,gender,age FROM tbl_employee WHERE (age BETWEEN ? AND ?) LIMIT ?,?
==> Parameters: 10(Integer), 30(Integer), 0(Long), 2(Long)
<==    Columns: id, last_name, email, gender, age
<==        Row: 1, tom, tom@qq.com, 1, 20
<==        Row: 2, jack, jack@qq.com, 1, 21
<==      Total: 2
Employee(id=1, lastName=tom, email=tom@qq.com, gender=1, age=20, salary=null)
Employee(id=2, lastName=jack, email=jack@qq.com, gender=1, age=21, salary=null)

若是想要查询年龄在10~30岁且性别为男的员工信息,该怎么实现呢?
@Test
void contextLoads() {
    QueryWrapper<Employee> wrapper = new QueryWrapper<Employee>()
        .between("age", 10, 30)
        .eq("gender",1);
    Page<Employee> page = employeeMapper.selectPage(new Page<>(1, 2), wrapper);
    List<Employee> emps = page.getRecords();
    for (Employee emp : emps) {
        System.out.println(emp);
    }
}

直接在QueryWrapper对象上链式调用即可,需要什么条件就加什么条件。
再看selectList方法,提出一个需求,查询性别为男,名字中带有字母j或者邮箱中带有字母b的员工信息,实现如下:
@Test
void contextLoads() {
    QueryWrapper<Employee> wrapper = new QueryWrapper<Employee>()
        .eq("gender", 1)
        .like("last_name", "j")
        .or()
        .like("email", "b");
    List<Employee> emps = employeeMapper.selectList(wrapper);
    for (Employee emp : emps) {
        System.out.println(emp);
    }
}

或关系只需要调用or()方法即可实现,执行结果:
==>  Preparing: SELECT id,last_name,email,gender,age FROM tbl_employee WHERE (gender = ? AND last_name LIKE ? OR email LIKE ?)
==> Parameters: 1(Integer), %j%(String), %b%(String)
<==    Columns: id, last_name, email, gender, age
<==        Row: 2, jack, jack@qq.com, 1, 21
<==        Row: 5, bbb, bbb@qq.com, 1, 30
<==      Total: 2
Employee(id=2, lastName=jack, email=jack@qq.com, gender=1, age=21, salary=null)
Employee(id=5, lastName=bbb, email=bbb@qq.com, gender=1, age=30, salary=null)

既然有QueryWrapper提供查询,那么就应该有UpdateWrapper用于更新,比如修改名字中带字母j并且年龄为21岁的员工信息,将其年龄修改为30岁,实现如下:
@Test
void contextLoads() {
    Employee employee = new Employee();
    employee.setAge(30);
    UpdateWrapper<Employee> wrapper = new UpdateWrapper<Employee>()
        .like("last_name", "j")
        .eq("age", 21);
    employeeMapper.update(employee, wrapper);
}

对于删除操作,我们仍然使用QueryWrapper来完成条件的限定,比如删除名字中带字母b并且年龄为30岁的男性员工信息,实现如下:
@Test
void contextLoads() {
    QueryWrapper<Employee> wrapper = new QueryWrapper<Employee>()
        .like("last_name", "b")
        .eq("age", 30)
        .eq("gender", 1);
    employeeMapper.delete(wrapper);
}

条件构造器的功能远不止于此,具体细节可以参照官方文档:
https://mybatis.plus/guide/wrapper.html
代码生成器
与MyBatis一样,MyBatisPlus同样提供了代码生成器,而且是基于Java代码进行生成的,相比于MyBatis,也更具有扩展性。
引入依赖:
<dependency>
  <groupId>com.baomidou</groupId>
  <artifactId>mybatis-plus-generator</artifactId>
  <version>3.4.1</version>
</dependency>
<dependency>
  <groupId>org.apache.velocity</groupId>
  <artifactId>velocity-engine-core</artifactId>
  <version>2.2</version>
</dependency>

然后编写生成代码:
@Test
void contextLoads() {
    // 全局配置
    GlobalConfig globalConfig = new GlobalConfig();
    globalConfig.setAuthor("wwj") // 作者
        .setOutputDir("C:/Users/Administrator/Desktop/ideaworkspace/mybatisplus-demo/src/main/java") // 生成路径
        .setFileOverride(true)  // 若多次生成,则文件覆盖
        .setIdType(IdType.AUTO) // 主键策略
        .setServiceName("%sService") // 设置生成的service接口名不携带首字母I --> IEmployeeService
        .setBaseResultMap(true)
        .setBaseColumnList(true);    // 生成sql片段
    // 数据源配置
    DataSourceConfig dataSourceConfig = new DataSourceConfig();
    dataSourceConfig.setDbType(DbType.MYSQL)    // 设置数据库类型
        .setDriverName("com.mysql.cj.jdbc.Driver")
        .setUrl("jdbc:mysql:///mybatisplus?serverTimezone=UTC")
        .setUsername("root")
        .setPassword("123456");
    // 策略配置
    StrategyConfig strategyConfig = new StrategyConfig();
    strategyConfig.setCapitalMode(true) // 开启全局大写命名
        .setColumnNaming(NamingStrategy.underline_to_camel) // 设置字段名与属性的驼峰命名映射
        .setTablePrefix("tbl_") // 设置表名前缀
        .setInclude("tbl_employee"); // 作用于哪张表
    // 包名配置
    PackageConfig packageConfig = new PackageConfig();
    packageConfig.setParent("com.wwj.mybatisplusdemo") // 设置父包名
        .setMapper("mapper") // 设置Mapper接口生成的位置
        .setService("service") // 设置Service生成的位置
        .setController("controller") // 设置Controller生成的位置
        .setEntity("bean") // 设置实体类生成的位置
        .setXml("mapper"); // 设置Mapper映射文件生成的位置
    // 整合配置
    AutoGenerator autoGenerator = new AutoGenerator();
    autoGenerator.setGlobalConfig(globalConfig)
        .setDataSource(dataSourceConfig)
        .setStrategy(strategyConfig)
        .setPackageInfo(packageConfig);
    // 执行
    autoGenerator.execute();
}

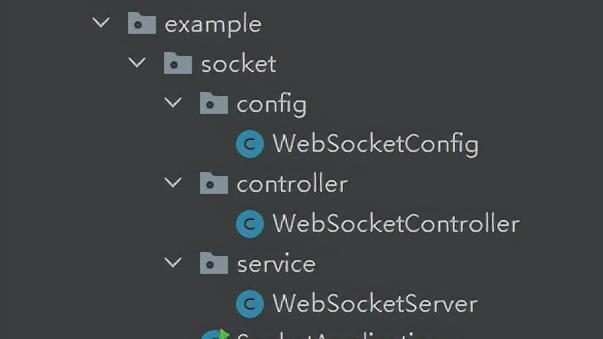
最后执行即可生成实体类、Mapper接口、Service、Controller和Mapper映射文件:


需要注意的是Service的实现类:
@Service
public class EmployeeServiceImpl extends ServiceImpl<EmployeeMapper, Employee> implements EmployeeService {
}

它继承自ServiceImpl:
public class ServiceImpl<M extends BaseMapper<T>, T> implements IService<T> {

    protected Log log = LogFactory.getLog(getClass());

    @Autowired
    protected M baseMapper;

    ......
}

该类提供了一些简单的服务方法,所以我们无需编写任何代码就可以使用一些简单的增删改查服务代码,而且它自动注入了M泛型的baseMapper,所以我们也能够直接在EmployeeServiceImpl中使用该Mapper。
插件
MyBatisPlus提供了一些非常好用的框架来简化我们的开发,一起来看看吧。
分页插件
在前面的分页方法中我们已经使用到了分页插件,这里再简单介绍一下吧。
要想使用分页插件,首先就需要将该插件注册到容器中:
@Configuration
public class MyBatisConfig {

    @Bean
    public PaginationInterceptor paginationInterceptor() {
        return new PaginationInterceptor();
    }
}

然后就可以使用了:
@Test
void contextLoads() {
    Page<Employee> page = employeeMapper.selectPage(new Page<>(1, 2), null);
    List<Employee> emps = page.getRecords();
    for (Employee emp : emps) {
        System.out.println(emp);
    }
}

Page对象中封装了非常多的信息,比如:
@Test
void contextLoads() {
    Page<Employee> page = employeeMapper.selectPage(new Page<>(1, 2), null);
    // 获取分页数据
    List<Employee> emps = page.getRecords();
    System.out.println("获取总条数:" + page.getTotal());
    System.out.println("获取当前页码:" + page.getCurrent());
    System.out.println("获取总页码:" + page.getPages());
    System.out.println("获取每页显示的数据条数:" + page.getSize());
    System.out.println("是否有上一页:" + page.hasPrevious());
    System.out.println("是否有下一页:" + page.hasNext());
}

执行结果:
获取总条数:4
获取当前页码:1
获取总页码:2
获取每页显示的数据条数:2
是否有上一页:false
是否有下一页:true

执行分析插件
该插件的作用是分析update和delete操作,防止小白误操作或恶意的攻击,需要注意的是该插件仅支持MySQL5.6.3以上版本。
使用也非常简单,首先将插件注册到容器中:
@Bean
public BlockAttackInnerInterceptor blockAttackInnerInterceptor(){
    return new BlockAttackInnerInterceptor();
}

此时我们执行全表删除操作:
@Test
void contextLoads() {
    employeeMapper.delete(null);
}

MyBatisPlus会帮助我们自动停止该操作,并抛出一个异常。
以上便是有关MyBatisPlus的全部内容。