全新架构的 Hmily 分布式事务框架 2.1.1发布
来源:https://www.oschina.net/news/118917/hmily-2-1-1-released
感谢朋友们一路以来的支持,让大家久等了。在这一个版本中,我们团队重构了整个项目,合理的划分功能模块,新增配置中心,调整底层存储结构,解决疑难bug,以及其他新功能的支持,也吸收了更多开源社区的优秀人才的加入。
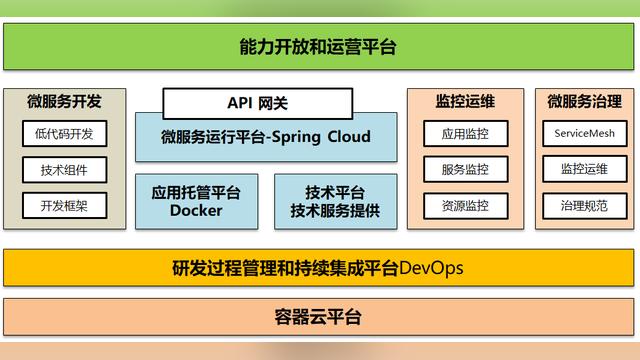
架构全景图

功能
- 高可靠性 :支持分布式场景下,事务异常回滚,超时异常恢复,防止事务悬挂。
- 易用性 :提供零侵入性式的 Spring-Boot, Spring-Namespace 快速与业务系统集成。
- 高性能 :去中心化设计,与业务系统完全融合,天然支持集群部署。
- 可观测性 :Metrics多项指标性能监控,以及admin管理后台UI展示。
- 多种RPC :支持 Dubbo, SpringCloud,Montan ,sofa-rpc等知名RPC框架。
- 日志存储 :支持 MySQL, oracle, mongodb, redis, zookeeper 等方式。
- 复杂场景 :支持RPC嵌套调用事务。
重构部分
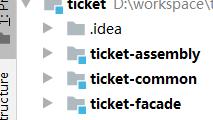
- 在模块划分上:抽离出开箱即用的SPI自定义模块。定义事务日志多种存储方式的SPI模块。定义事务日志多种序列化方式的SPI模块。新增配置中心,支持各种主流的配置中心(nacos,apollo,zookeeper等),并支持配置的动态刷新。新增metrics模块,用来监控运行时候的各种信息。抽离出核心的事务执行模块。抽离出多种RPC支持模块。抽离出spring与spring boot 支持模块。
- 在依赖包版本上:guava升级到29.0curator 升级到5.1.0
- 在代码质量上:严格的check-style代码检查,秉承优雅,简单易懂原则(talk is cheap ,show you code)。
- 在开放性上:社区奉行简单,快乐,和谐基本原则
- 在目标上:打造一款高可用,高性能,简单易用金融级的分布式事务解决方案。
解决疑难bug:
- dubbo框架不支持注解方式的使用(spring-boot-starter-dubbo)。h
- motan框架不支持注解方式的使用。
- spring-cloud用户如果使用feign与hystrix整合hmily时候的线程切换问题。
- 极端情况下事务日志序列化异常。
- try阶段超时异常,导致事务悬挂bug。
- confirm与cancel阶段异常时候,事务未能正确恢复bug。
- 在事务日志存储上,支持同步与异步2种模式,供用户选择。
用户使用与升级指南
对于hmily用户来说,只需三个步骤,即可解决RPC服务调用之间的柔性事务
- 引用hmily对各种rpc支持的jar包。
- 添加hmily配置。
- 在rpc接口方法上添加 @Hmily注解。
依赖的变更
用户依赖的方式没有更改,只需要将版本升级到2.1.0。下面举dubbo微服务列子
dubbo rpc微服务
- dubbo接口服务依赖
     <dependency>
          <groupId>org.dromara</groupId>
          <artifactId>hmily-annotation</artifactId>
          <version>2.1.0</version>
      </dependency>
- dubbo服务提供者依赖(<2.7)
       <dependency>
            <groupId>org.dromara</groupId>
            <artifactId>hmily-dubbo</artifactId>
           <version>2.1.0</version>
        </dependency>
    or       <dependency>
            <groupId>org.dromara</groupId>
            <artifactId>hmily-spring-boot-starter-dubbo</artifactId>
           <version>2.1.0</version>
        </dependency>
hmily配置的变更
在新版2.1.0中,新增了hmily-config模块,支持本地与注册中心模式。用户首先需要在项目resouce文件下新建一个名称为hmily.yml的文件。默认路径为项目的 resource目录下,也可以使用 -Dhmily.conf 指定,也可以把配置放在 user.dir 目录下。优先级别 -Dhmily.conf > user.dir >resource。文件格式如下(一部分,以下是配置成本地模式):
  server:
    configMode: local
    AppName: account-dubbo
  #  如果server.configMode eq local 的时候才会读取到这里的配置信息.  config:
    appName: account-dubbo
    serializer: kryo
    contextTransmittalMode: threadLocal
    scheduledThreadMax: 16
    scheduledRecoveryDelay: 60
    scheduledCleanDelay: 60
    scheduledPhyDeletedDelay: 600
    scheduledInitDelay: 30
    recoverDelayTime: 60
    cleanDelayTime: 180
    limit: 200
    retryMax: 10
    bufferSize: 8192
    consumerThreads: 16
    asyncRepository: true
    autoSql: true
    phyDeleted: true
    storeDays: 3
    repository: mysql
repository:
  database:
    driverClassName: com.mysql.jdbc.Driver
    url : jdbc:mysql://127.0.0.1:3306/hmily?useUnicode=true&characterEncoding=utf8
    username: root
    password:
    maxActive: 20
    minIdle: 10
    connectionTimeout: 30000
    idleTimeout: 600000
    maxLifetime: 1800000
如果你想将配置文件放在`Nacos`配置中心:
- 第一步:
hmily:
  server:
    configMode: nacos
    appName: xxxxx
  #  如果server.configMode eq local 的时候才会读取到这里的配置信息.remote:
  nacos:
    server: 192.168.3.22:8848
    dataId: hmily.properties
    group: DEFAULT_GROUP
    timeoutMs: 6000
    fileExtension: yml
    passive: true
- 第二步:将hmily的配置,放在 nacos配置中心上
如果你想将配置文件放在`Apollo`配置中心:
- 第一步:
hmily:
  server:
    configMode: apollo
    appName: xxxx
  #  如果server.configMode eq local 的时候才会读取到这里的配置信息.remote:
  apollo:
    appId: hmily-xxxxx
    configService: http://192.168.3.22:8080
    namespace: byin_hmily
    secret:
    fileExtension: yml
    passive: true
    env: dev
    meta: http://192.168.3.22:8080
- 第二步:将hmily的配置,放在 apollo配置中心上
还有其他的配置方式以及配置内容的详解,请参考:https://dromara.org/zh-cn/docs/hmily/config.html
注解方式的使用的变更
在之前的版本中,rpc接口与实现都只需要添加 @Hmily 注解, 现在需要进行变更,在rpc接口方法上是添加 @Hmily,用来标识这是一个hmily分布式事务的接口方法, 在接口的方法实现上则需要添加 @HmilyTCC,然后指定 confirm 与 cancel方法名称.
举例(dubbo中say方法需要参与分布式事务):
public interface HelloService {
    @Hmily
    void say(String hello);
}public class HelloServiceImpl implements HelloService  {
    @HmilyTCC(confirmMethod = "sayConfrim", cancelMethod = "sayCancel")
    public void say(String hello) {
         System.out.println("hello world");
    }    public void sayConfrim(String hello) {
         System.out.println(" confirm hello world");
    }    public void sayCancel(String hello) {
         System.out.println(" cancel hello world");
    }}
举例(springcloud中say方法需要参与分布式事务):
- spring-cloud服务调用方FeignClient中
@FeignClient(value = "helle-service")
public interface HelloService {    @Hmily
    @RequestMapping("/helle-service/sayHello")
    void say(String hello);}
- spring-cloud服务提供方
@RestController
public class HelloController {
    private final HelloService helloService ;
    @Autowired
    public AccountController(HelloService helloService) {
        this.helloService= helloService;
    }    @RequestMapping("/sayHello")
    public void payment(String hello) {
        return helloService.say(hello);
    }}public interface HelloService {
    void say(String hello);
}public class HelloServiceImpl implements HelloService  {
    @HmilyTCC(confirmMethod = "sayConfrim", cancelMethod = "sayCancel")
    public void say(String hello) {
         System.out.println("hello world");
    }    public void sayConfrim(String hello) {
         System.out.println(" confirm hello world");
    }    public void sayCancel(String hello) {
         System.out.println(" cancel hello world");
    }}
事务日志存储结构的更改
在使用上,用户使用或者升级不用关心,框架会默认初始化好。
下一个版本
- 因为调整了架构,在其他模式的支持上将会变得更加容易,在下一个版本,将会发布TAC模式(try-auto-cancel)使用此模式,将大大简化框架的使用程度,开发者不需要关心confirm以及cancel 方法的开发,对老系统的改造提供了更好的兼容性,不用担心额外的开发任务,一切就交给hmily吧。
- 将对brpc用户进行支持。
- 将对tars-rpc用户进行支持。
社区共建
我们秉承和谐快乐,代码至上的原则,如果你有想法,愿意和我们一起成长,一起贡献,快来加入我们吧!
- github:https://github.com/dromara/hmily
- gitee:https://gitee.com/shuaiqiyu/hmily
